Brisket Gary Parker's Way: All the Juicy Details
Ever wondered how to get your brisket more tender, more juicy, and more flavorful? You make decent barbeque, and it’s easy to think you’ve learned all there is to know. But making brisket is really somethin’ of a science, and there’s always room to improve. Here's a look into the science that is cookin’ the perfect brisket!
Smokers
When learning how to make a better brisket, people usually ask, “What do you do to the meat?” But the secret to great brisket doesn’t lie in the meat itself. Here’s the truth: you gotta start with the pit!
The first thing you can do is take a look at the type of smoker you have. What does your smoker do? There are offset smokers where smoke travels from a side fire box, through a horizontal cooking chamber, and out the stack at the other end. Reverse flow smokers add an element of radiant heat, heating a metal shelf beneath the grates, sandwiching the meat between risen heat and smoke that comes across the cooking chamber. Some folks will go for fast vertical cookers where the heat and smoke source is directly beneath the cooking chamber, while others will pick up a Traeger grill for the job.
Steel Thickness
Now that you know how your smoker works, the next thing you’ll want to take note of is the steel thickness of your smoker. Is it thin, rolled steel? Is it formed steel ⅛ of an inch thick? Or is your steel heavy-duty, ranging from ¼ to ⅜ inches?
Why should you care? Well, if you’re tryin’ to hold 250 degrees of heat for 12 hours, the thickness of your smoker makes a big difference. You’ll have your work cut out for you with thinner steel that loses heat anytime a breeze comes along!
Air Flow
Speaking of a breeze, this next one might surprise you: wind. Yup, we said it! Air flow is yet another factor to consider when makin’ brisket.
When you’re cooking, let’s say in a pass-through smoker, fire burns heat and smoke up through the shelves, from the side of the fire box to the other end at the smoke stack. The wind direction in that smoker influences both the way you trim your brisket and how you lay it on the pit.
The point of the brisket with the top muscles is very marbley as opposed to the leaner flat. Lay this point in the direction the heat and smoke is coming from in your smoker. Because this part has a lot of mass, it’s goin’ to take a longer time in the pit. By facing it towards the heat, you can ensure that thicker part of the brisket cooks through. Turn that muscle in the other direction, and the lean part bears the brunt of the heat, leavin’ you with a hard and dried-out brisket.
Low and Slow
In the process of makin’ brisket, it’s important to exercise patience. Don’t be in a hurry! Let the smoker do its thing. When it comes to trappin’ heat, make sure not to open up that door too often.
Know this: “If you’re lookin’ you ain’t cookin!”
You can always use a thermal probe in the thickest part of the meat to know if you’re going too fast.
Raise your brisket’s internal temperature to 160 degrees and hold it there. The longer you keep it there, the more flavor and more bark! You’re allowing smoke to penetrate, melting that fat to integrate with the salt and pepper you seasoned with.
If your temperature isn’t movin’, don’t worry! Don't make the mistake of adding more wood to the fire to increase the temperature when you see it plateau. We want low and slow—a steady temperature is just what we’re lookin’ for. Keep your pit between 200 and 250 degrees (225 is the sweet spot) and hold long enough to create good bark and a quarter inch of a smoke ring. This can take anywhere from 10 to 14 hours or more!
Wrap
Now, it’s time to wrap your brisket. Wrapping is important because it holds in steam and superheats it, rendering the fat and breaking down collagen to leave your brisket soft and smoky. You can use paper or aluminum foil (the Texas Crutch!). If using paper, use pink butcher paper made just for barbeque. White butcher paper is wax-coated on one side, which repels liquid. Pink butcher paper is more porous, designed to let the meat breathe. Try both paper and aluminum foil at home and see the difference in the product!
Rendering
You’re ready to render! This is where we get that satisfying, tender texture that everyone loves. Crank your pit up to 320 to 325 degrees. The goal is to get your pit very hot while your brisket is protected in foil or paper. We’re gonna move the core temperature from 160 to 200 degrees fast—be sure to keep an eye on it. Watch your thermal probe, and when you hit 206 to 207 degrees at the thickest spot, hold it for 10 to 15 minutes.
You can also render in an oven. Wrap your brisket, put it on a tray, and pop it in your home oven at the same temperature!
Lettin’ it Rest
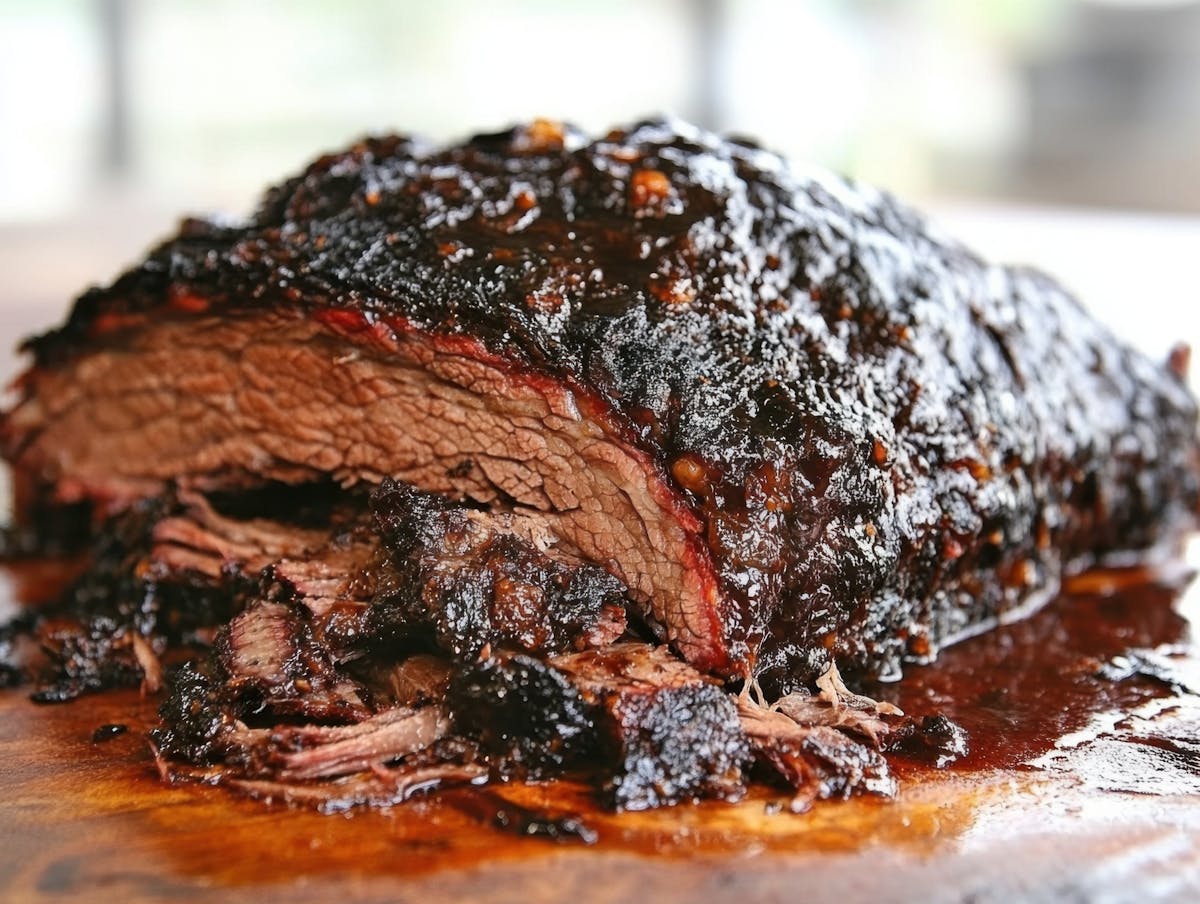
Remember when we said patience was important? Here’s the final stretch. Put your wrapped brisket in an ice chest with nothing in it, close it shut, and sit on it for a couple hours. Once down to about 140 degrees, your brisket is ready to serve! Take the paper with all the juices and squeeze it back over the top of it. If done right, your brisket will wiggle when prodded. This loose, gelatinous consistency is how you know you’ve got brisket!
Tip: Put your brisket in a pan. As it cools in the ice chest, it will suck the juice with all the collagen that came off back inside of it, makin’ your brisket even more savory.
BBQ Brisket Disasters
As with any science, if things can go right, things can also go very wrong. Here are a couple brisket disasters to look out for.
If your brisket comes out too dry, try again next time. This means you melted the fat too fast. You didn’t have the brisket wrapped to capture the steam, so it all evaporated. The more evaporation, the drier the brisket. Remember: the flat already doesn't have any fat, so if you let all the juice get away? No recovery.
Now, say your brisket is falling apart. Congratulations! You got stew meat. You rendered for too long and too hot. Remember: 206 to 207 degrees, hold it for 10 minutes, and done. Don't overdo it. Hold your brisket long enough to get a consistent texture throughout, get it in an ice chest, and let it rest.
Mastering the Science
Makin’ the perfect brisket takes time to master. It is a science that becomes instinctual only with time and practice. Keep track of your process at home! Note what you did and how the brisket came out. Soon enough you’ll find a groove that works for you, one step closer to that deliciously perfect barbeque brisket! Want to learn more? Check out our videos here, and listen to Gary cover many barbeque topics !